更新说明:对文章目录排版做了调整。
更新时间:2022-05-04

本周代码提交分支至:lesson05

第一章:本周导学

1-1本周整体内容介绍和学习方法

收获

  • 完成脚手架创建项目流程开发
  • 命令行交互方法
  • 服务端框架egg.js应用和API开发方法
  • egg.js集成mongodb

第二章 脚手架项目创建功能架构设计

2-1 脚手架创建项目功能架构背后的思考
架构背后的思考

  • 可扩展:能够快速复用到不同团队,适用不同团队的差异。
  • 低成本:在不改动脚手架源码的基础上,新增模版,且新增模板的成本很低。
  • 高性能:控制存储空间,安装时充分利用Node多进程提升安装性能。

2-2 项目创建前准备阶段架构设计

init
2-3 下载项目模板阶段架构设计

downloadTemplate

第三章 项目基本信息获取功能开发(详解命令行交互)

3-1 项目创建准备阶段——判断当前目录是否为空功能开发

本周代码从commands/init/lib/index.js文件中的exec方法开始启动。
根据上面的两小节分析,exec方法的代码逻辑为:

  • 准备阶段 【this.prepare()】
  • 下载模版
  • 安装模版(下周实现)

prepare方法的代码逻辑为:

  1. 判断当前目录是否为空
  2. 是否强制清空
  3. 选择创建项目或组件
  4. 获取项目/组件的基本信息

本节主要实现的代码是判断当前目录是否为空

1
2
3
4
5
6
7
8
9
10
11
12
13
prepare(){
if(!this.isCwdEmpty()){
// 询问是否继续创建
}
}
isCwdEmpty(){
const localPath = process.cwd();
let fileList = fs.readdirSync(localPath)
// 文件过滤逻辑
fileList = fileList.filter((file)=>{
!file.startsWith('.') && ['node_modules'].indexOf <=0
})
}

本节知识点:

  • 拿到当前目录的方法一:process.cwd()
  • 拿到当前目录的方法二: path.resolve(‘.’)
  • path.resolve(__dirname):拿到的是当前执行代码的目录
  • 读取当前目录下的文件列表:fs.readdirSync()

3-2 inquirer基本用法和常用属性入门

继续写代码前,首先在测试项目里体验inquirer

1
2
3
4
5
6
7
8
9
10
11
12
13
14
15
16
17
18
19
20
21
22
23
24
25
26
27
28
29
30
31
32
33
const inquirer = require('inquirer')
inquirer
.prompt([{
type:'input',
name:'name',
message:'your name:',
default:'liugezhou',
validate:function(v){ //对输入的参数进行校验,检验通过可进行下一步
return typeof v === 'string'
},
filter:function(v){ //对用户输入的内容进行优化返回
return v+'!'
},
transformer: function(v){ //相当于一个placeholder显示作用
return 'name :'+ v
}
},{
type:'number', // inquirer可以传入数组
name:'age',
message:'your age:',
default:'18'
}])
.then(answers => {
console.log(answers.name)
console.log(answers.age)
})
.catch(error => {
if(error.isTtyError) {
console.log('error')
} else {
// Something else when wrong
}
});

3-3 inquirer其他交互形式演示

本节主要对list、rawlist、expand、confirm、checkbox等进行了功能与代码测试
测试代码提交至 inquirer

3-4 强制清空当前目录功能开发

本节主要是清空当前目录,进行清空下,使用命令行交互inquirer问询,以及用 force这个参数添加业务逻辑,进行目录的清空判断

清空目录功能主要是使用了第三方库_fs-extra_的**emptyDirSync(localPath)**方法。

3-5 获取项目基本信息功能开发

本节使用inquirer进行了项目或者组件的选择询问、以及版本号控制台输入功能,但未对输入内容进行校验
这里调整好代码逻辑即可。

3-6 项目名称和版本号合法性校验

本节的主要内容为合法项目名称的正则校验

1
2
3
4
5
6
7
function isValidName(v) {
// 规则一:输入的首字符为英文字符
// 规则二:尾字符必须为英文或数字
// 规则三:字符仅允许-和_两种
// \w=a-zA_Z0-9_
return /^[a-zA-Z]+([-][a-zA-Z][a-zA-Z0-9]*|[_][a-zA-Z][a-zA-Z0-9]*|[a-zA-Z0-9])*$/.test(v)
}

正则表达式规则:
首字符:^
尾字符:$
\w=a-zA-Z0-9_
首字符必须为英文字符:/^[a-zA-Z]$/
中间可以为英文数字或者-_:/^[a-zA-Z]+[\w-]/
尾字符必须为英文或者数字:/^[a-zA-Z]
[\w-]*[a-zA-Z]$/.test(v)

以上表达式规则,没有处理当项目名称为一个的时候的问题

给出不合法的命名有:1,a-,a,a_1,a-1_
/^[a-zA-Z]+([-][a-zA-Z][a-zA-Z0-9]*|[][a-zA-Z][a-zA-Z0-9]*|[a-zA-Z0-9])$/.test(v)_

PS:3-6这里关于检验性输错后依旧报错的问题,没有得到解决,先暂缓了!

第四章 预备知识:egg.js + 云 mongodb 快速入门

4-1 下载项目模板功能实现流程分析+egg.js简介

上一节我们获得了项目信息,这一节通过获得的项目信息进行模板的下载

通过项目模版API获取项目模版信息

  • 通过egg.js搭建一套后台系统 (4-2 至 4-5)
  • 通过npm存储项目模版
  • 将项目模版信息存储到mongodb数据库中
  • 通过egg.js获取mongodb中的数据并且通过API将其返回

在进行egg.js快速搭建后台系统前,对egg.js + 云mongodb进行一个快速的入门学习。

  • egg基于koa2生成的一个企业级框架。

4-2 cloudscope-cli-server后端项目创建
快速搭建项目

  • mkdir cloudscope-cli-server
  • cd cloudscope-cli-server
  • npm init egg --type=simple
  • npm i
  • npm run dev

这里需要注意的一点是:npm init egg
实际执行的是 create-egg这个包。

4-3 通过egg.js框架添加新的API

本节主要多egg脚手架进行了简单演示,将原路由home以及文件删除,新建了project/template路由以及controller。
路由在app/router.js中

1
2
3
4
5
6
7
8
9
10
'use strict';

/**
* @param {Egg.Application} app - egg application
*/
module.exports = app => {
const { router, controller } = app;
router.get('/project/template', controller.project.getTemplate);
};

controller of project

1
2
3
4
5
6
7
8
9
10
11
12
13
'use strict';

const Controller = require('egg').Controller;

class ProjectController extends Controller {
async getTemplate() {
const { ctx } = this;
ctx.body = 'get template';
}
}

module.exports = ProjectController;

4-4 云mongodb开通+本地mongodb调试技巧讲解

本地安装mongodb:https://www.runoob.com/mongodb/mongodb-osx-install.html

启动:

  1. 终端输入:mongod
    1. 报错,提示找不到/data/db目录
  2. 添加dbpath:
    1. 在本地新建 /Users/liugezhou/data/db目录
    2. 同步启动方式:mongod --dbpath=/Users/liugezhou/data/db
    3. 异步启动:在后面添加 --fork

注:由于我本地之前已经配好了,所以我本地的启动方式为:mongod --config /usr/local/etc/mongod.conf
查看mongodb.conf文件,我本地的dbpath路径为:/usr/local/var/mongodb

安装第三方工具:Robot 3T
连接到本地后:

  • create database (liugezhou-cli)
  • create collection (project)
  • insert Doucument (添加数据)
  • add user (cloudscope/cloudscope)

4-5 egg.js接入mongodb方法

本地mongodb数据库创建完成后,开始连接我们的本地数据库。

回到上节新创建的项目,sam老师安装的第三方依赖为

  • app下新建utils/mongo.js
  • npm i -S @pick-star/cli-mongodb

由于@pick-star/cli-mongodb代码较少,我这里选择不安装,本地敲一遍代码:

  • cnpm i -S npmlog mpngodb
  • 在utils目录下新建log.js
1
2
3
4
5
6
7
8
9
'use strict'

const npmlog = require('npmlog')
log.level = process.env.LOG_LEVEL ? process.env.LOG_LEVEL : 'info';
log.headingStyle = { fg: 'red', bg: 'white' };
log.heading = 'liugezhou';
log.addLevel('success', 2500, { fg: 'green' });

module.exports = log;
  • 在utils目录下新建mongodb.js(@pick-star/cli-mongodb源码)
1
2
3
4
5
6
7
8
9
10
11
12
13
14
15
16
17
18
19
20
21
22
23
24
25
26
27
28
29
30
31
32
33
34
35
36
37
38
39
40
41
42
43
44
45
46
47
48
49
50
51
52
53
54
55
56
57
58
59
60
61
62
63
64
65
66
67
68
69
70
71
72
73
74
75
76
77
78
79
80
81
82
83
84
85
86
87
88
89
90
91
92
93
94
95
96
97
98
'use strict';

const MongoClient = require('mongodb').MongoClient;
const logger = require('./log');

class Mongo {
constructor(url) {
this.url = url;
}

connect() {
return new Promise((resolve, reject) => {
MongoClient.connect(
this.url,
{
useNewUrlParser: true,
useUnifiedTopology: true,
},
(err, client) => {
if (err) {
reject(err);
} else {
const db = client.db();
resolve({ db, client });
}
});
});
}

connectAction(docName, action) {
return new Promise(async (resolve, reject) => {
const { db, client } = await this.connect();
try {
const collection = db.collection(docName);
action(collection, result => {
this.close(client);
logger.verbose('result', result);
resolve(result);
}, err => {
this.close(client);
logger.error(err.toString());
reject(err);
});
} catch (err) {
this.close(client);
logger.error(err.toString());
reject(err);
}
});
}

query(docName) {
return this.connectAction(docName, (collection, onSuccess, onError) => {
collection.find({}, { projection: { _id: 0 } }).toArray((err, docs) => {
if (err) {
onError(err);
} else {
onSuccess(docs);
}
});
});
}

insert(docName, data) {
return this.connectAction(docName, (collection, onSuccess, onError) => {
collection.insertMany(data, (err, result) => {
if (err) {
onError(err);
} else {
onSuccess(result);
}
});
});
}

remove(docName, data) {
return this.connectAction(docName, (collection, onSuccess, onError) => {
collection.deleteOne(data, (err, result) => {
if (err) {
onError(err);
} else {
onSuccess(result);
}
});
});
}

update() {

}

close(client) {
client && client.close();
}
}

module.exports = Mongo;

utils/mongo.js 代码修改:

1
2
3
4
5
6
7
8
9
10
11
'use strict';

const Mongodb = require('./mongodb');
const { mongoDbName } = require('../../config/db');

function mongo() {
return new Mongodb(mongodbUrl);
}

module.exports = mongo;

接着,在mongo.js暴露出去

1
2
3
4
5
6
7
8
9
10
11
12
13
14
15
16
17
18
19
'use stirct'

const Mongodb = require('./mongodb')
const { mongoDbUrl,mongodbName} = require('../../config/db') // 配置这两个参数

function mongo(){
return new Mongodb(mongoDbUrl,mongodbName)
}

// config/db.js
'use strict';

// Mondodb
const mongodbUrl = `mongodb://${user}:${pass}@liugezhou.com:27017/${database}`;

module.exports = {
mongodbUrl,
};

最后,在Controller的project中访问:

1
2
3
4
5
6
const mongo = require('./mongo.js')
async getTemplate(){
const { ctx } = this;
const data = await mongo().query('project');
ctx.body = data;
}

第五章 项目模板开发 + 获取项目模板 API 开发

5-1 脚手架初始化项目模版开发

模版项目代码提交至:liugezhou-cli-dev-template

项目模板建好后,npm publish发布至npm。

5-2 脚手架请求项目模板API开发
回到脚手架项目

  • 在utils下创建包: lerna create @cloudscope-cli/request
  • cd utils
  • npm i -S axios
1
2
3
4
5
6
7
8
9
10
11
12
13
14
15
16
17
18
// utils/request/lib.index

const axios = require('axios')
const baseURL = process.env.CLI_URL?process.env.CLI_URL:'https://liugezhou.com:7001'
const request = axios.create({
baseURL,
timeout:5000
})

request.interceptors.response.use({
response =>{
return response.data
},
error =>{
return Promise.reject(error)
}
})
module.exports = request

commands/init引入@cloudsope-cli/request包
新建 lib/getProjectTemplate

1
2
3
4
5
6
7
const request = require('@cloudscope-cli/request')

modules.exports = function(){
return request({
url:'/project/template'
})
}
1
2
3
// commands/init/lib/index.js
const getProjectTemplate = require('./getProjectTemplate')
const template = getProjectTemplate()

最后在测试项目下测试,打印template,成功。

5-3 通过环境变量配置默认URL+选择项目模板功能开发

本章内容回顾了process.env的配置,以及inquirer新添加询问需要选择的项目模版是什么。

5-4 基于vue-element-admin开发通用的中后台项目模板

5-1 中已将项目模版更新至git仓库,且已发布到npm中。
只需要在mongodb数据库将后台模版name、npmName、version添加后即可。

第六章 脚手架项目模板下载功能开发

6-1 脚手架下载项目模板功能开发

本节的主要内容为项目模版的安装

1
2
3
4
5
6
7
8
9
10
11
12
13
14
15
16
17
18
19
20
21
22
23
// commands/init/lib/index.js
async downloadTemplate(){
const {projectTemplate} = this.projectInfo
const templateInfo = this.template.find(item=> item.npmName === projectTemplate)
const targetPath = path.resolve(userHome,'.cloudscope-cli','template')
const storeDir = path.resolve(userHome,'.cloudscope-cli','template','node_modules')
const {npmName,version} = templateInfo
const templatePkg = new Package({
targetPath,
storeDir,
packageName:npmName,
packageVersion:version
})
if(await templatePkg.exists()){
// 更新package
log.verbose('更新template')
await templatePkg.update();
}else{
// 安装package
log.verbose('安装template')
await templatePkg.install();
}
}

6-2 通过spinner实现命令行loading效果

首先在utils/utils中添加spinnerStart和sleep方法

1
2
3
4
5
6
7
8
9
10
11
12
13
// utils/utils/lib/index.js

function spinnerStart(msg,spinnerString ='|\-\\'){
const Spinner = require('cli-spinner').Spinner
const spinner = new Spinner(`${msg} %s`)
spinner.setSpinnerString(spinnerString)
spinner.start()
return spinner
}

function sleep(timeout = 1000){
return new Promise(resolve => setTimeout(resolve,timeout))
}

然后在commands/init/lib/index.js中将spinner引入使用、测试。
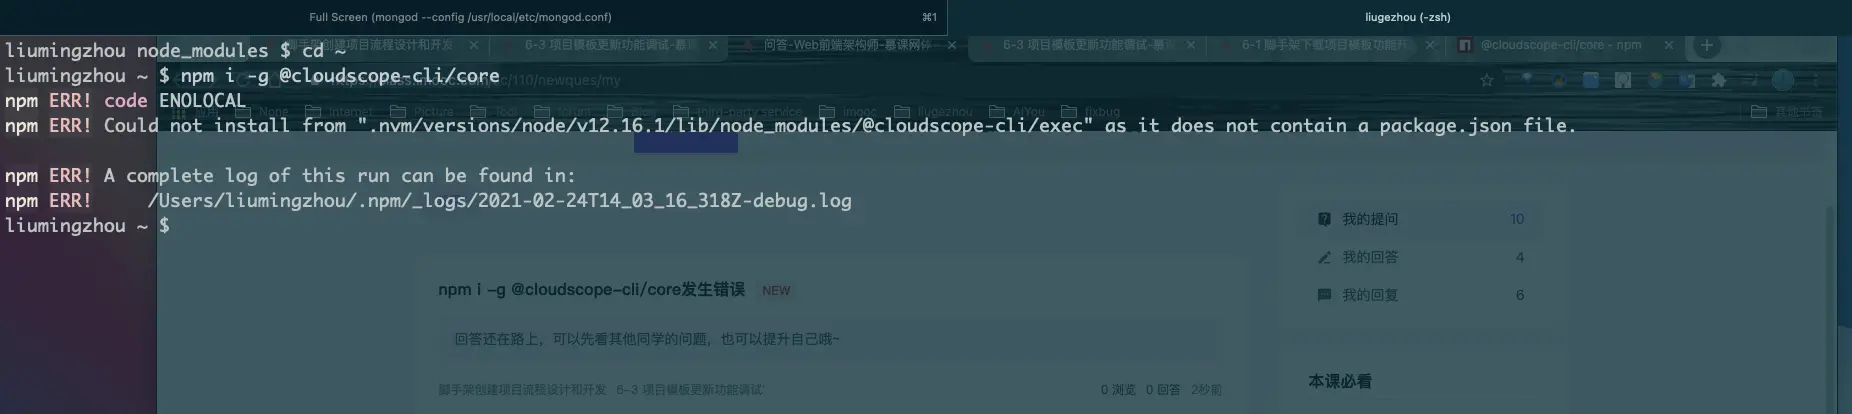
6-3 项目模板更新功能调试

本节主要是安装功能的测试,以及第一次安装模版不存在时,关于spinner.stop的finnal处理。

PS:在本节完成之后,发布至npm,本地全局安装的时候,出现错误,还未找到原因。
5-1

第七章:本周加餐:inquirer源码解析:彻底搞懂命令行交互原理

7-1 本章学习路径和目标

  • 掌握 readline/events/stream/ansi-escapes/rxjs
  • 掌握命令行交互的实现原理,并实现一个可交互的列表
  • 分析inquirer源码掌握其中的关键实现

7-2 readline的使用方法和实现原理

readline是Node.js中的一个内置库,主要是用来管理输入流的

1
2
3
4
5
6
7
8
9
10
11
const readline = require('readline')

const rl = readline.createInterface({
input:process.stdin,
output:process.stdout
})

rl.question('your name:',(answer =>{
console.log('your name is:'+answer)
rl.close()
}))

源码分析:

  • 强制将函数转为构建函数
1
2
3
4
5
6
function Interface(input, output, completer, terminal) {
if (!(this instanceof Interface)) {
return new Interface(input, output, completer, terminal);
}
…………
}
  • 获得事件驱动能力:EventEmitter.call(this);
  • 监听键盘事件:
1
2
3
4
5
emitKeypressEvents(input, this);

// `input` usually refers to stdin
input.on('keypress', onkeypress);
input.on('end', ontermend);

7-3 高能:深入讲解readline键盘输入监听实现原理

7-4 秀操作:手写readline核心实现

1
2
3
4
5
6
7
8
9
10
11
12
13
14
15
16
17
18
19
20
21
22
23
24
25
26
27
28
29
30
31
32
33
34
35
36
37
38
39
40
41
42
43
44
45
46
function setpread(callback){
function onkeypress(s){
output.write(s);
line += s
switch (s) {
case '\r':
input.pause();
callback(line)
break;

default:
break;
}
}
const input = process.stdin;
const output = process.stdout;
let line =''

emitKeypressEvents(input)
input.on('keypress',onkeypress)

input.setRawMode(true) //进入原生模式
input.resume()
}


function emitKeypressEvents(stream){
function onData(chunk){
g.next(chunk.toString())
}
const g = emitKeys(stream)
g.next()
stream.on('data',onData)
}

function* emitKeys(stream){
while (true) {
let ch = yield;
stream.emit('keypress',ch)
}
}

setpread(function(s){
console.log('answer:',s)
})

7-5 命令行样式修改的核心原理:ansi转义序列讲解

ansi-escape-code:ansi转义序列
定义的一个规范,终端通过转义字符实现特殊操作。
通过这里查询:https://handwiki.org/wiki/ANSI_escape_code

1
2
3
// 固定格式为:(  \x1B[  ) +  ('通过上面网站查询出来的参数')
console.log('\x1B[31m\x1B[4m%s','your name:')
console.log('\x1B[20G%s','test')

7-6 讨论readline

7-7 响应式库rxjs快速入门

rxjs是一个异步的库,和我们的Promise是非常相似的。readline源码大量使用了这个库。

1
2
3
4
5
6
7
8
9
10
11
12
// npm install rxjs
const range = require('rxjs').range;
const { map, filter } = require('rxjs/operators');

const pipe = range(1, 200)
.pipe(
filter(x => x % 2 === 1),
map(x => x + x),
filter(x => x%3 === 0),
filter(x => x%5 === 0)
)
pipe.subscribe(x => console.log(x));

7-8& 7-9 放大招:手写命令行交互式列表组件
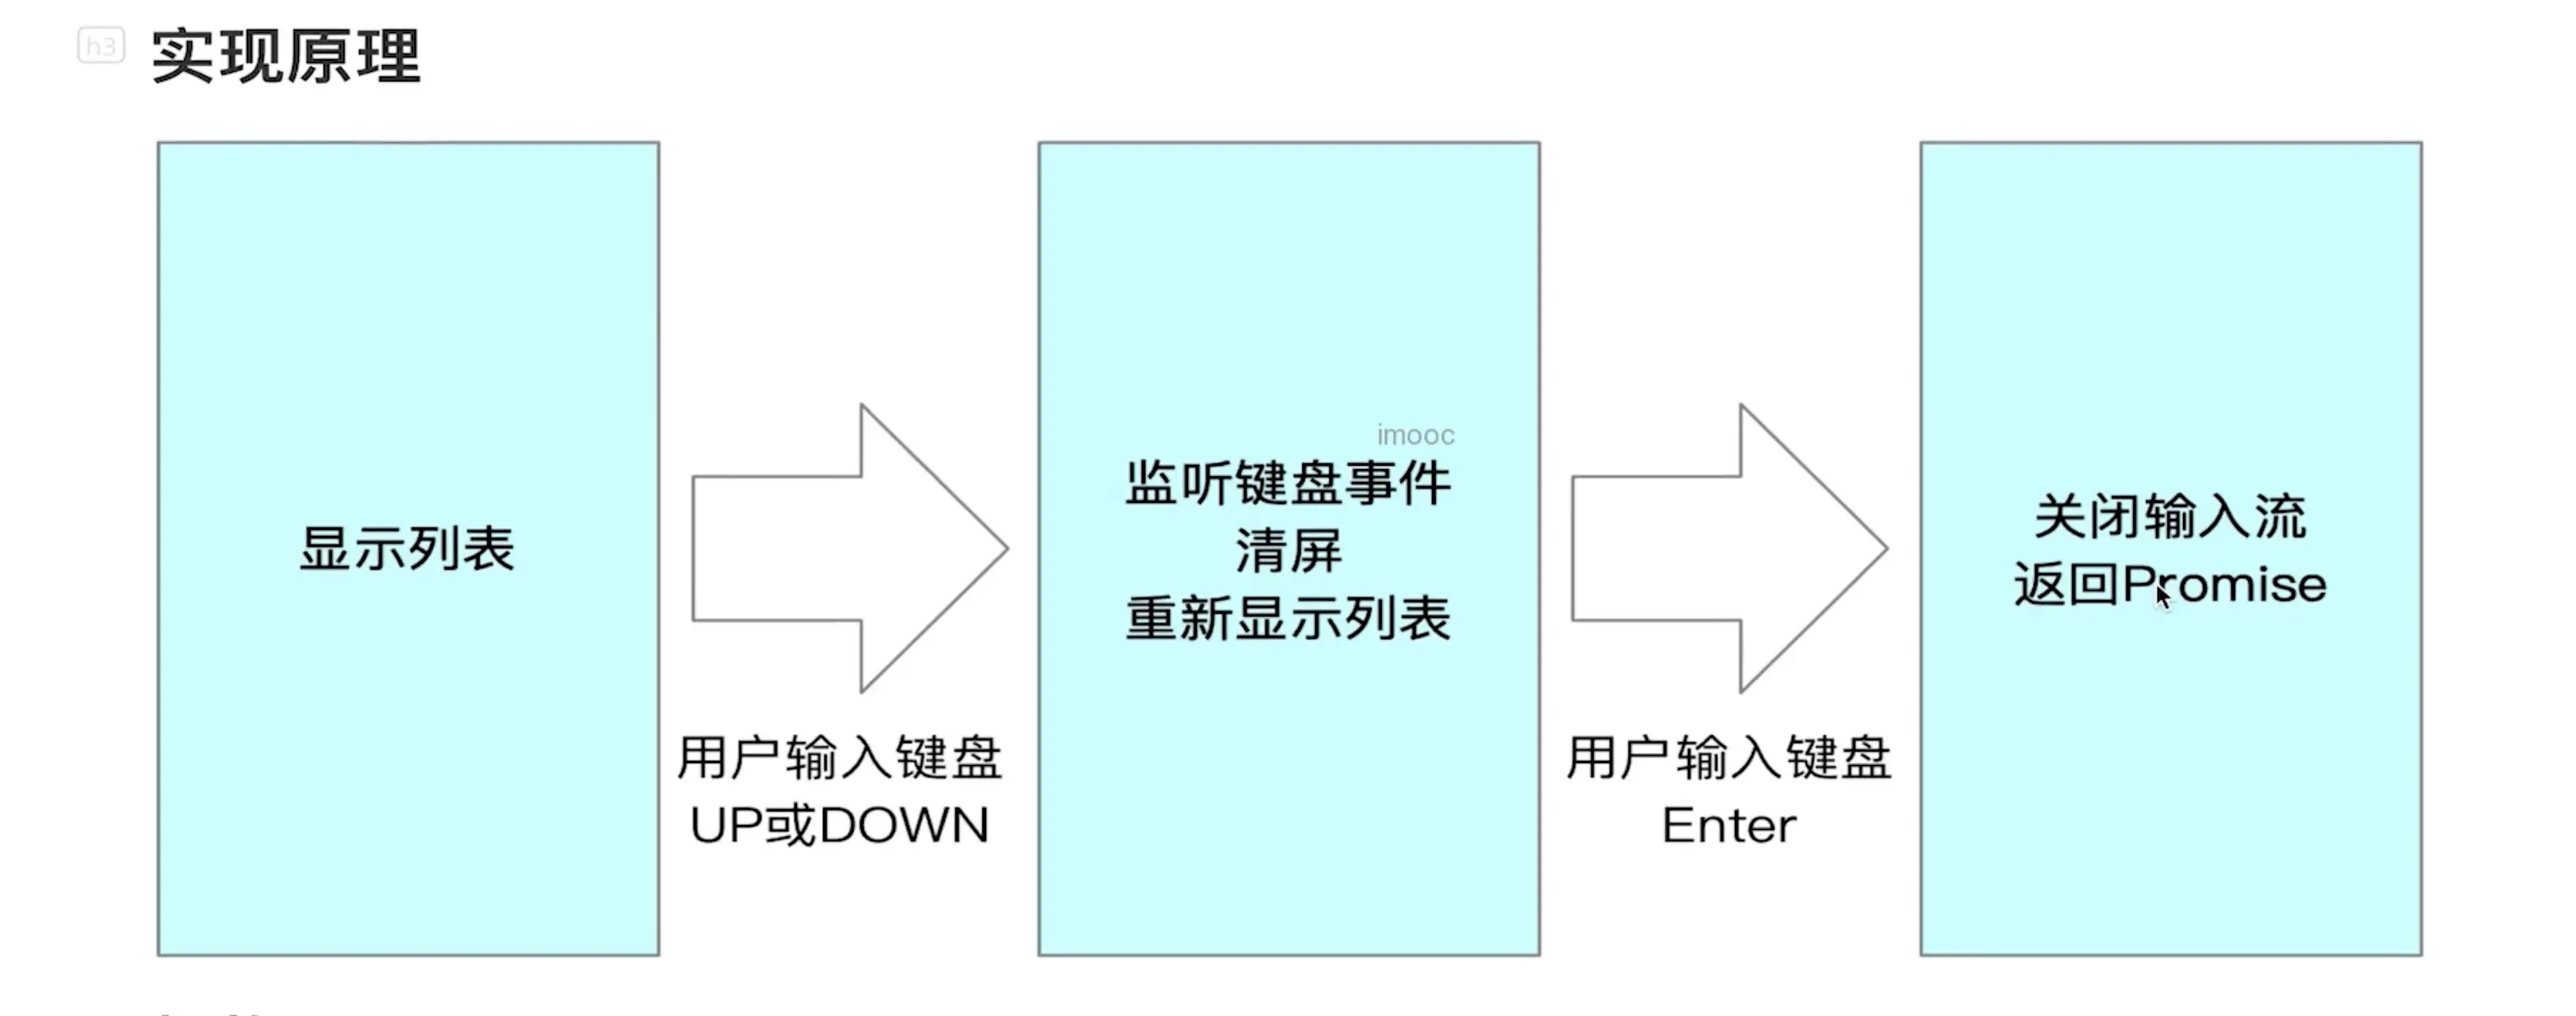
5-2

1
2
3
4
5
6
7
8
9
10
11
12
13
14
15
16
17
18
19
20
21
22
23
24
25
26
27
28
29
30
31
32
33
34
35
36
37
38
39
40
41
42
43
44
45
46
47
48
49
50
51
52
53
54
55
56
57
58
59
60
61
62
63
64
65
66
67
68
69
70
71
72
73
74
75
76
77
78
79
80
81
82
83
84
85
86
87
88
89
90
91
92
93
94
95
96
97
98
99
100
101
102
103
104
105
106
107
108
109
110
111
112
113
114
115
116
117
118
119
120
121
122
123
124
125
126
127
128
const EventEmitter = require('events');
const readline = require('readline');
const MuteStream = require('mute-stream');
const { fromEvent } = require('rxjs');
const ansiEscapes = require('ansi-escapes');

const option = {
type: 'list',
name: 'name',
message: 'select your name:',
choices: [{
name: 'sam', value: 'sam',
}, {
name: 'shuangyue', value: 'sy',
}, {
name: 'zhangxuan', value: 'zx',
}],
};

function Prompt(option) {
return new Promise((resolve, reject) => {
try {
const list = new List(option);
list.render();
list.on('exit', function(answers) {
resolve(answers);
})
} catch (e) {
reject(e);
}
});
}

class List extends EventEmitter {
constructor(option) {
super();
this.name = option.name;
this.message = option.message;
this.choices = option.choices;
this.input = process.stdin;
const ms = new MuteStream();
ms.pipe(process.stdout);
this.output = ms;
this.rl = readline.createInterface({
input: this.input,
output: this.output,
});
this.selected = 0;
this.height = 0;
this.keypress = fromEvent(this.rl.input, 'keypress')
.forEach(this.onkeypress);
this.haveSelected = false; // 是否已经选择完毕
}

onkeypress = (keymap) => {
const key = keymap[1];
if (key.name === 'down') {
this.selected++;
if (this.selected > this.choices.length - 1) {
this.selected = 0;
}
this.render();
} else if (key.name === 'up') {
this.selected--;
if (this.selected < 0) {
this.selected = this.choices.length - 1;
}
this.render();
} else if (key.name === 'return') {
this.haveSelected = true;
this.render();
this.close();
this.emit('exit', this.choices[this.selected]);
}
};

render() {
this.output.unmute();
this.clean();
this.output.write(this.getContent());
this.output.mute();
}

getContent = () => {
if (!this.haveSelected) {
let title = '\x1B[32m?\x1B[39m \x1B[1m' + this.message + '\x1B[22m\x1B[0m \x1B[0m\x1B[2m(Use arrow keys)\x1B[22m\n';
this.choices.forEach((choice, index) => {
if (index === this.selected) {
// 判断是否为最后一个元素,如果是,则不加\n
if (index === this.choices.length - 1) {
title += '\x1B[36m❯ ' + choice.name + '\x1B[39m ';
} else {
title += '\x1B[36m❯ ' + choice.name + '\x1B[39m \n';
}
} else {
if (index === this.choices.length - 1) {
title += ' ' + choice.name;
} else {
title += ' ' + choice.name + '\n';
}
}
});
this.height = this.choices.length + 1;
return title;
} else {
// 输入结束后的逻辑
const name = this.choices[this.selected].name;
let title = '\x1B[32m?\x1B[39m \x1B[1m' + this.message + '\x1B[22m\x1B[0m \x1B[36m' + name + '\x1B[39m\x1B[0m \n';
return title;
}
};

clean() {
const emptyLines = ansiEscapes.eraseLines(this.height);
this.output.write(emptyLines);
}

close() {
this.output.unmute();
this.rl.output.end();
this.rl.pause();
this.rl.close();
}
}

Prompt(option).then(answers => {
console.log('answers:', answers);
});

7-10 inquirer源码执行流程分析